
Why A Little Ear Care Goes A Long Way
Cats are famously fastidious groomers, often spending hours each day keeping themselves spick and span. You might wonder, then, if their ears ever need a helping hand from us. As of July 2026, veterinary advice consistently confirms that while cats do self-clean to an extent, their ear canals can still accumulate debris, wax, and sometimes even harbor infections or parasites that require owner intervention.
Last updated: July 12, 2026
This guide is designed for any cat owner who wants to ensure their feline friend’s ears are as healthy as the rest of them. We’ll break down why ear cleaning is important, how to spot when it’s needed, and most crucially, how to perform the task safely and gently. Let’s ensure your cat’s hearing remains sharp and their ears comfortable.
Key Takeaways
- Most cats don’t need to frequent ear cleaning, but regular checks are vital for early detection of issues.
- Signs your cat’s ears need cleaning include dark discharge, odor, head-shaking, or scratching.
- Always use a vet-approved ear cleaner; never water or harsh chemicals.
- Gentle handling and positive reinforcement are key to making ear cleaning a less stressful experience.
- If you suspect an infection or see significant debris, consult your veterinarian.
When Your Cat’s Ears Signal a Need for Cleaning
Unlike dogs, cats generally don’t require routine ear cleaning unless there’s a specific reason. Their ear canals have a unique L-shape, with a vertical part leading to a horizontal canal closer to the eardrum. This structure helps trap debris, but it can also make it harder for them to expel everything on their own.
You should consider cleaning your cat’s ears if you notice any of the following signs: dark brown or black discharge, a foul or yeasty odor, excessive wax buildup, or if your cat is frequently shaking their head, tilting it to one side, or scratching at their ears. These can all indicate a need for attention, and sometimes, a visit to the vet.
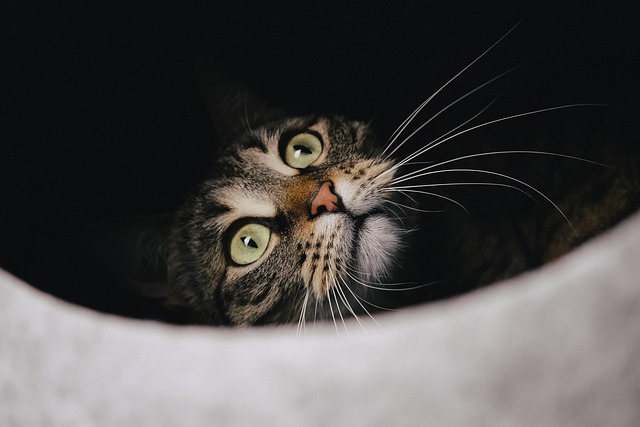
Understanding Feline Ear Anatomy: Why it Matters
Feline ear anatomy is complex and fascinating. The outer ear, or pinna, is responsible for catching sound waves. These waves then travel down the ear canal to the tympanic membrane (eardrum). As mentioned, the cat’s ear canal is shaped like an ‘L’ – a vertical portion followed by a horizontal portion.
This shape means dirt, wax, and foreign bodies can get lodged deep inside, making it difficult for the cat to dislodge them. While this design offers some protection, it also makes them susceptible to conditions like ear infections if wax and debris build up. According to the American Veterinary Medical Association (AVMA) in 2026, understanding this anatomy is the first step in effective at-home care and knowing when professional help is needed.
Gathering Your Cat Ear Cleaning Supplies
Before you begin, ensure you have everything you need to make the process as smooth as possible. Rushing or fumbling for supplies can stress your cat. The primary item you’ll need is a high-quality, veterinarian-approved cat ear cleaning solution. These are specifically formulated to be safe and effective for feline ears, breaking down wax and gently cleansing without irritation.
Avoid using water, rubbing alcohol, hydrogen peroxide, or human ear drops. These can be too harsh, cause irritation, or even damage the delicate ear tissues. You’ll also need soft cotton balls or gauze pads (never cotton swabs, as they can push debris further in or injure the eardrum) and some tasty treats to reward your cat afterwards.
How to Clean Your Cat’s Ears: A Gentle 6-Step Process
Cleaning your cat’s ears doesn’t have to be a battle. With patience and the right technique, most cats tolerate it well. The key is to remain calm and positive throughout the process.
- Choose the Right Time: Pick a time when your cat is relaxed, perhaps after a meal or a nap. Avoid times when they are playful or agitated.
- Secure Your Cat: Gently hold your cat in your lap or have another person assist you to keep them calm and still. You might want to wrap them loosely in a towel, ensuring their head is free, to prevent them from scratching.
- Administer the Cleaner: Gently lift your cat’s ear flap (pinna) to expose the ear canal. Carefully insert the tip of the ear cleaner bottle just into the opening of the vertical canal and squeeze the recommended amount of solution (check the product label or your vet’s instructions) into the ear.
- Massage Gently: With the cleaner inside, gently massage the base of the ear for about 20–30 seconds. You should hear a squishing sound as the solution works its way down the canal, loosening debris.
- Wipe Away Debris: Allow your cat to shake their head – this helps to bring loosened debris to the outer ear. Then, use a cotton ball or gauze pad to gently wipe away any visible dirt and excess cleaner from the opening of the ear canal and the inside of the pinna. Don’t probe deep into the ear canal.
- Reward and Repeat: Offer your cat a favourite treat and praise them for their cooperation. If cleaning both ears, repeat the process on the other ear.
Remember, the goal is to clean the outer parts of the ear canal, not to deep-clean. If you encounter significant resistance or your cat shows signs of pain, stop and consult your veterinarian.

Pitfalls to Sidestep: Common Cat Ear Cleaning Mistakes
Even with the best intentions, some common mistakes can occur during cat ear cleaning, potentially causing more harm than good. One of the most critical is using cotton swabs (Q-tips). These can easily push ear wax and debris further down the ear canal, potentially impacting it or even damaging the eardrum if used too deeply. Always stick to cotton balls or gauze.
Another mistake is using the wrong cleaning solution. Human ear drops, alcohol, or even water can be irritating or ineffective. Always opt for a solution specifically formulated for cats and recommended by your vet. Forcing the cleaning process can create a negative association for your cat, making future attempts much harder. Patience and positive reinforcement are essential.
When to Seek Professional Help: Red Flags for Cat Ear Health
While at-home cleaning can manage mild wax buildup, certain signs indicate a more serious problem that requires veterinary attention. If you notice a very strong, unpleasant odor emanating from your cat’s ears, it could signal a bacterial or yeast infection. Similarly, a thick, pus-like discharge, or discharge that’s yellow, green, or bloody, warrants an immediate vet visit.
Excessive head shaking, persistent scratching, redness or swelling inside the ear, balance issues, or vocalization of pain when the ears are touched are also crucial red flags. According to the VCA Animal Hospitals website, these symptoms often point to infections, mites, or other underlying conditions that need professional diagnosis and treatment. As of July 2026, prompt veterinary care is the best way to prevent complications like chronic ear disease or hearing loss.
Determining the Right Frequency for Ear Cleaning
The frequency of ear cleaning for your cat depends heavily on the individual cat. Most healthy cats with no history of ear issues only need their ears checked and cleaned on an as-needed basis, perhaps once every few months, or even less often. Some cats, especially those prone to ear infections or with significant ear wax production, might require more frequent attention, as advised by your veterinarian.
A good rule of thumb is to check your cat’s ears weekly as part of their grooming routine. How to clean cat ears allows you to spot any changes or buildup early. If you don’t see any signs of dirt, wax, or odor, then no cleaning is necessary. Over-cleaning can actually strip the ears of their natural protective oils, potentially leading to irritation.
Making Ear Cleaning a Positive Experience
The success of cat ear cleaning often hinges on your cat’s willingness to cooperate. Employing positive reinforcement techniques can make a world of difference. Start by simply handling your cat’s ears gently for short periods without any cleaning products, rewarding them with praise and treats. Gradually increase the duration of handling.
Introduce the ear cleaning solution bottle by letting your cat sniff it, rewarding them for calm behaviour. Then, apply a small amount of cleaner to a cotton ball (not directly into the ear yet) and let them sniff it. Associate the smell and feel with positive experiences. When you do proceed to cleaning, keep sessions short, end on a positive note with a special treat or toy, and never punish your cat if they resist. This approach helps build trust and reduces stress for both of you.
Expert Tips for Maintaining Optimal Cat Ear Health
Beyond just cleaning, several other practices contribute to your cat’s overall ear health. Ensure your cat’s diet is balanced and supports a healthy immune system, as a strong immune response can help ward off infections. Regularly groom your cat, as this helps prevent excessive hair from growing into the ear canal, which can trap debris.
If your cat has long fur or is a breed prone to ear issues, your vet might suggest keeping the fur around the ear canals trimmed slightly. This is a task best left to a professional groomer or veterinarian, as it requires precision and care. Always follow your veterinarian’s specific recommendations for your individual cat’s needs.
Frequently Asked Questions
Can I use baby wipes to clean my cat’s ears?
While baby wipes are gentle for human skin, they are generally not recommended for cleaning cat ears. They lack the necessary cleaning agents to break down wax and debris effectively, and some ingredients could be irritating to a cat’s sensitive ear canal.
How do I know if my cat has ear mites?
Ear mites typically cause intense itching, leading to excessive scratching. You might observe dark, crumbly, coffee-ground-like debris in the ear canal. A veterinarian can confirm the presence of ear mites with a simple ear swab examination.
What if my cat won’t let me clean its ears?
If your cat is highly resistant, consult your veterinarian or a professional groomer. They have specialised techniques and tools, and can also assess if there’s an underlying pain or medical issue preventing the cleaning. Never force the issue, as it can create lasting fear.
Is it normal for cats to have smelly ears?
No, a strong, unpleasant odor is not normal for a cat’s ears. While a very mild, slightly waxy smell might be present, a pungent or foul smell typically indicates an infection, yeast overgrowth, or other health issue requiring veterinary diagnosis.
Can ear infections in cats spread to humans?
The most common causes of cat ear infections, such as bacteria and yeast, are generally not transmissible to humans. However, ear mites, while less common as a human parasite, can cause temporary skin irritation if they infest a person’s skin.
How much does a vet charge to clean cat ears?
The cost can vary widely by location and clinic. As of July 2026, a basic ear cleaning performed by a vet or vet tech typically ranges from £20 to £50, but this price can increase significantly if sedation is required or if an infection needs to be treated simultaneously.
Information current as of July 2026; pricing and product details may change.
Related read: Blood in Cat Stool: What It Means and When to Act
Editorial Note: This article was researched and written by the Pet Magazine editorial team. We fact-check our content and update it regularly. For questions or corrections, contact us. For readers asking “How to clean cat ears”, the answer comes down to the specific factors covered above.
Related read: Expert Pet Care Tips for a Thriving Companion.
Related read: Can Dogs Eat Mushrooms Safely in 2026?